How to Setup Proxmox and Qemu in Windows 10

How to add a Qemu agent in a Windows 10 VM.
Setup Qemu agent in Windows 10.
My particular use case for having Qemu setup, is so I can make use of Proxmox backup scheduling. All my VM’s need to run Qemu to do this, without errors.
This is a brief guide to downloading, installing, and testing it on a Windows 10 VM.
Downloading.
For my use case, I need to install the virtio-drivers for windows, as well as the Qemu-guest agent.
A proxmox read-up on installing Qemu can be found here
More information on the virtio-drivers are linked in the article here.
The fedora page documenting the different builds and ISO’s can be found here
Direct download link to stable release/build: Download
In your Winodws VM, download the ISO. Proceed to Mount it in windows.
Installing.
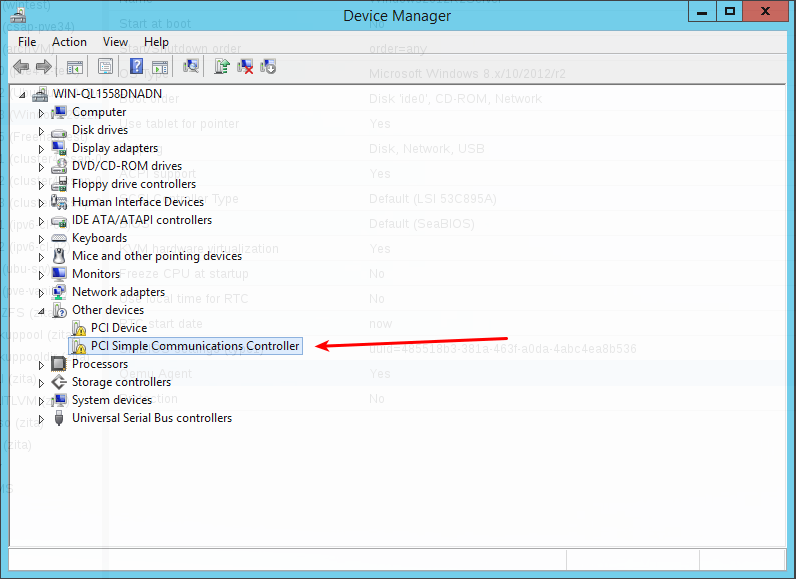
Open up device manager.

Find the new device called “PCI Simple Communications Controller” under “Other devices”
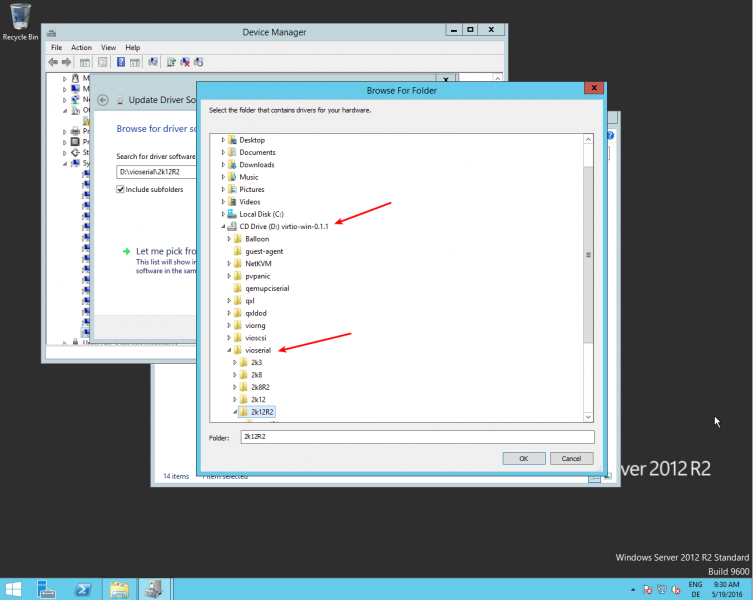
Right click and Update Driver, then locate the Mounted ISO, open the vioserial folder, and find the folder that matches your version of Windows running on the VM. Run through the installer.

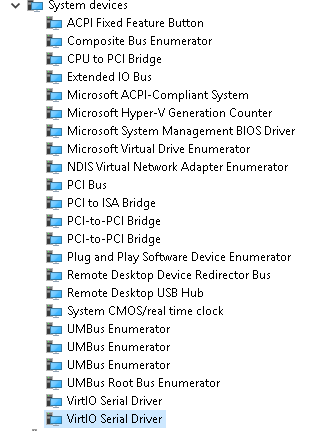
This should now add the shown virtio-drivers in device manager.

Now you can install the Qemu-agent. Simply go to the guest-agent folder on the ISO and run that installer.

Testing.
Now that everything is installed, we can test from in powershell.
Open powershell under admin.
Type in the command:
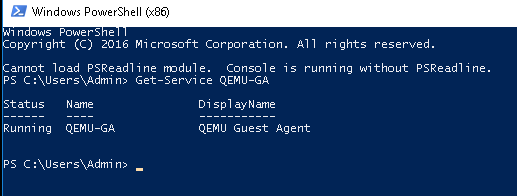
Get-Service QEMU-GA
This should return a result like below if installed correctly.
